Installing Starlink in an RV
So you’ve got your RV and now you’re looking at your Starlink and trying to figure out how to get the cable from your router to the dishy outside. You might also be wondering how you might use your Starlink when you’re boondocking and don’t have access to AC power. In my tutorial today I’ll walk you through some of the items I gathered and installed to make a very clean and easily deployable Starlink install for my RV.

First off you’ll need to decide whether you want to mount your dishy to the roof or if you would like have have your Starlink antenna a bit more mobile. In my case I wanted to be able to set my Starlink on a tripod and move it about my immediate campsite to find a clear view of the sky. This tutorial will focus on installing a hookup on the sidewall of your RV, rather than a permanent roof mount.
Items You’ll Need:
- SmartPlug Data Port (https://www.amazon.com/dp/B0D7RJTJR8?ref=ppx_yo2ov_dt_b_fed_asin_title)
- Cat7 Ethernet Patch Cable (https://www.amazon.com/dp/B0BXJ3N7ZS?ref=ppx_yo2ov_dt_b_fed_asin_title&th=1)
- Cat7 Keystone Jack (https://www.amazon.com/dp/B0BZW9283P?ref=ppx_yo2ov_dt_b_fed_asin_title&th=1)
- Starlink Gen 2 to Ethernet Adapter (https://amazon.com/dp/B0CQYR5JWS?ref=ppx_yo2ov_dt_b_fed_asin_title)
Tools You’ll Need:
- Multi-tool with Bi-metal Cutting Blade
- Wire Fish Tape
- 7/8″ Paddle Bit
- Silicone Sealant
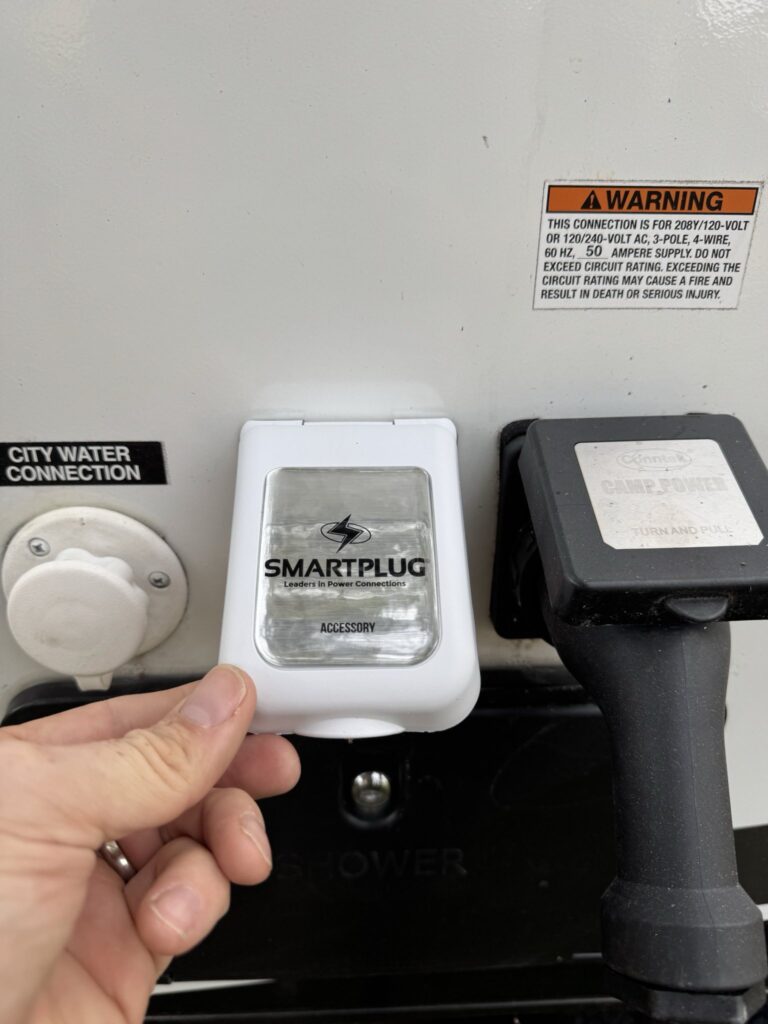
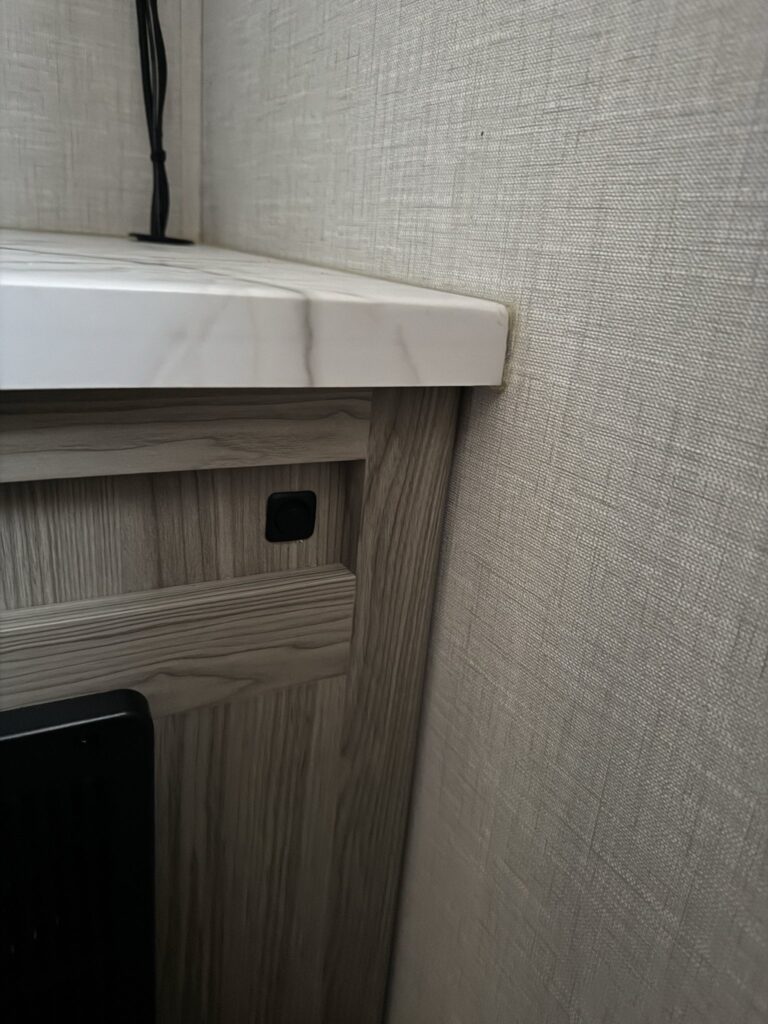
First thing you’ll do is identify the location for the installation of your SmartPlug port on the exterior of the RV. Generally if you look near the location of your shore power entrance you’ll have a convenient spot that typically is readily accessible from the interior and has enough space for the installation of the port. In my case this worked out perfectly. The shore power entrance came into the sidewall directly adjacent to the city water connection under the kitchen sink. You’ll take your SmartPlug unit and using a sharpie, trace the outline of your cut-out onto the wall. Take your multi-tool and carefully cut through the fiberglass exterior along your template lines.
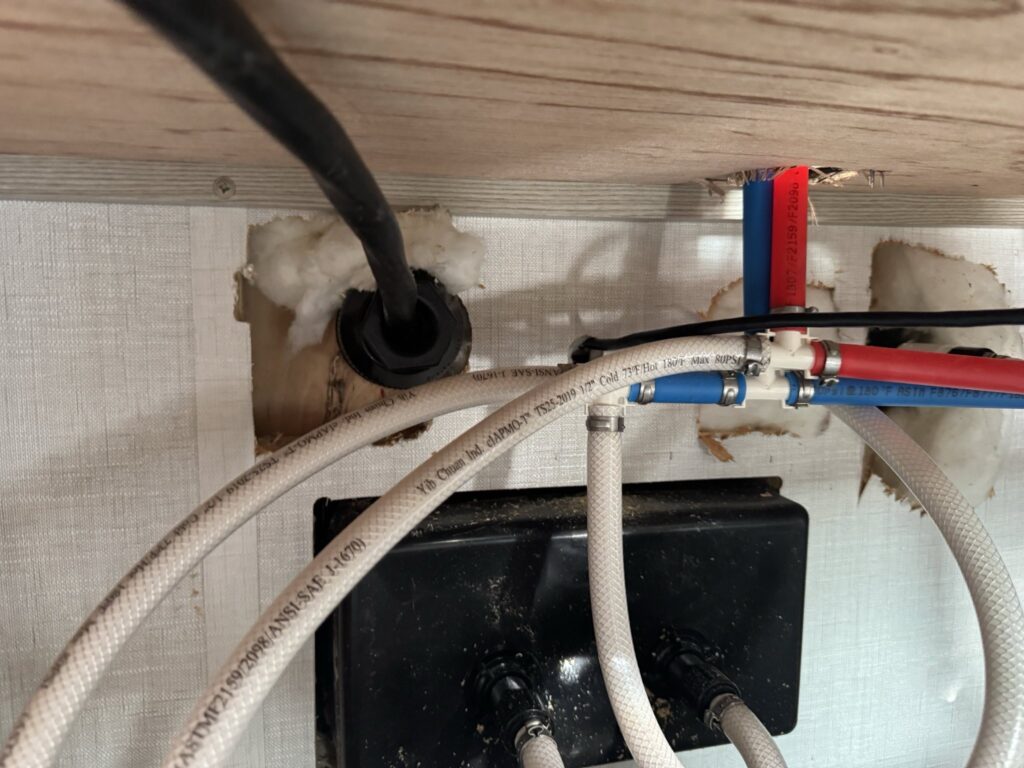
One key thing to watch out for as you’re completing the install is that after you cut out the exterior port template, you’ll drill through the inside of the wall, you’ll want to proceed very carefully and avoid nicking your shore power or the sink lines. Feed your ethernet cable our through the exterior of the camper. You’ll cut the end off your patch cable and terminate it into the Cat 7 Keystone you purchased. No special tools are needed with the one I put in the list above. You’ll just install each of the pairs into their appropriate spot in accordance with the instructions.
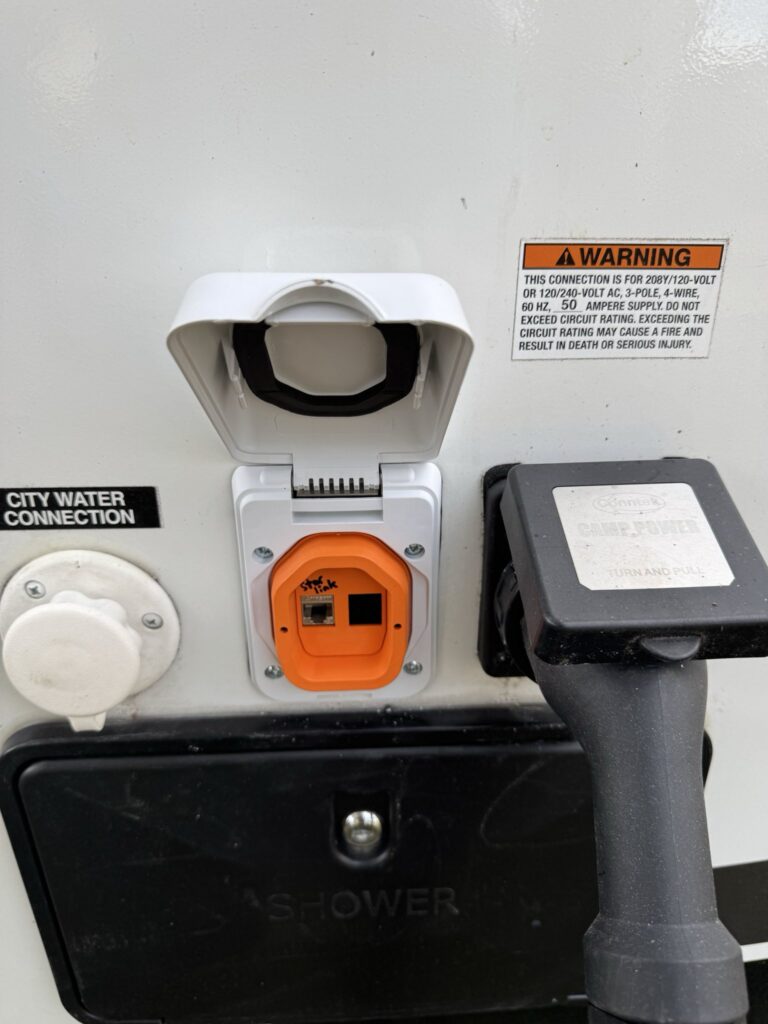
Once terminated, install your keystone into the Smartplug, hold the unit up to the exterior wall and using a fine tipped sharpie, mark each of the four screw holes. Take the unit back off the wall and pre-drill the four mounting holes with a drill bit just slightly smaller than your screws. Place a bit of silicone in each hole before installing the screws. Make sure you use course threaded screws that will grip the fiberglass/plywood firmly. I recommend you hand tighten these screws to avoid overtorquing and stripping out the holes. Tighten until the gasket is compressed and for an extra measure of waterproofing, consider putting a bead of silicone around the install.
I also strongly recommend labeling the port as Starlink to help avoid wiring in a conventional ethernet should one be available at a camp site. The Starlink cable is proprietary and higher powered than most typical POE devices. Connecting to conventional ethernet is likely to damage conventional switches and devices.
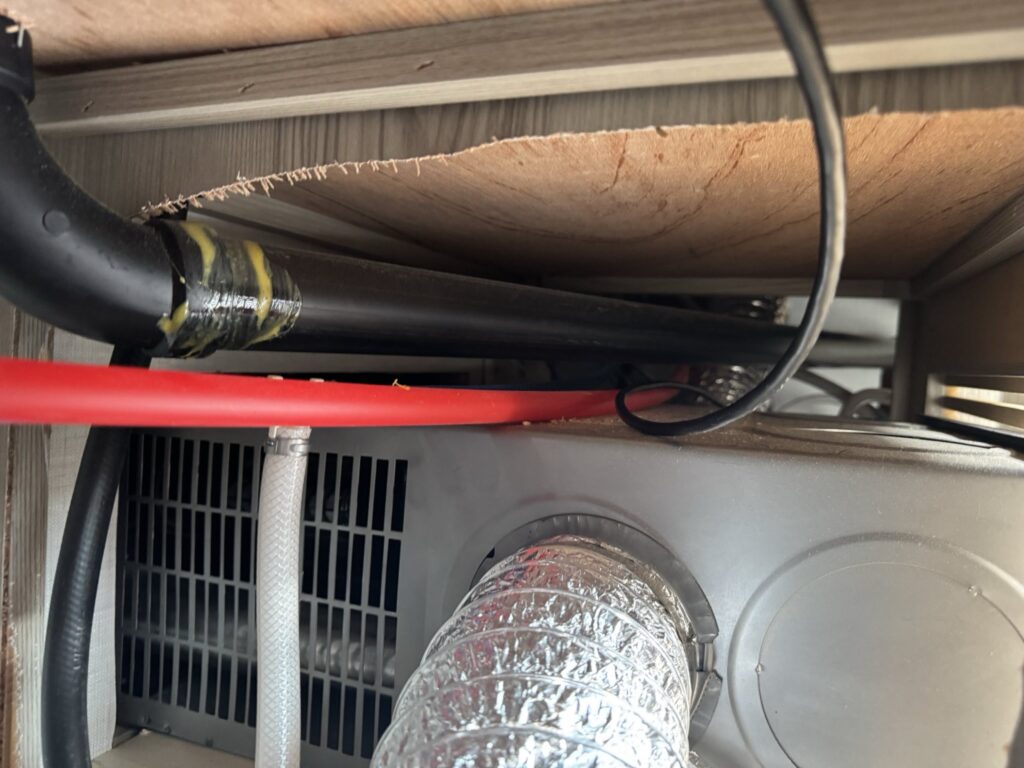
Using your fish tape, you can run the Ethernet cable through your under cabinet trough to wherever you want to place your Starlink router (or DC power supply).
In my case I installed a 12V DC starlink power injector. (https://www.amazon.com/dp/B0DGQD4RGY?ref=ppx_yo2ov_dt_b_fed_asin_title&th=1) Using this power supply, I’m able to use a gl-inet travel router powered by the USB on the 12V power injector. Power is fed from the DC power-distribution center to a switch and to the power-injector so that it can be switched off when not in use.
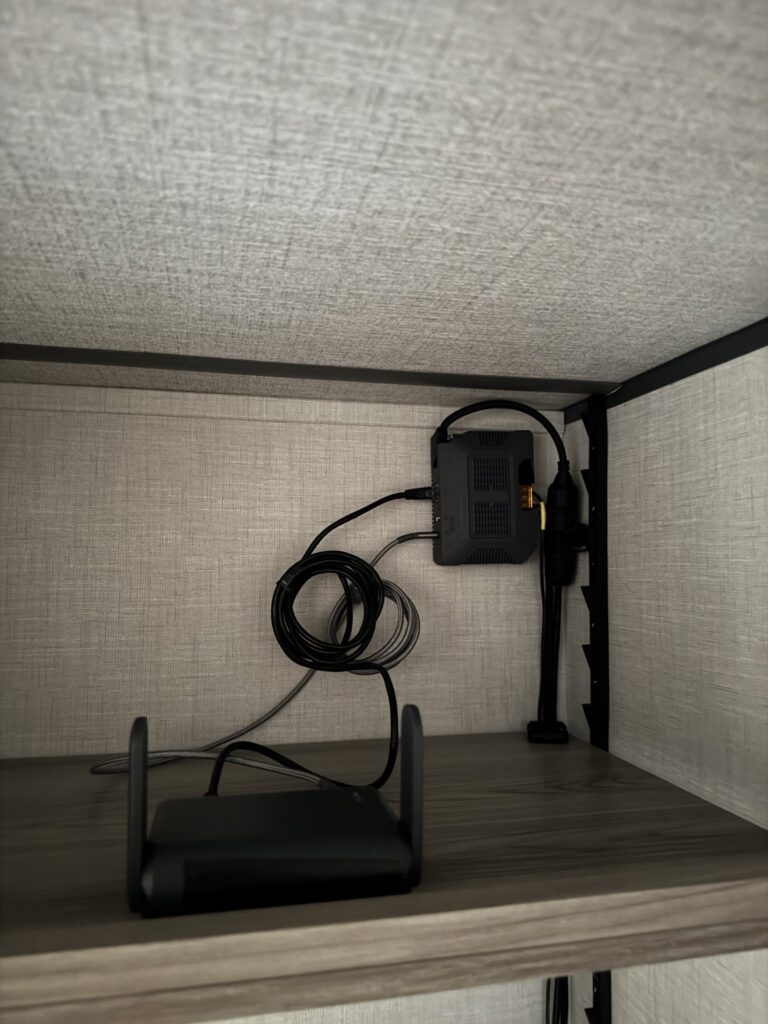
Finally, I purchased a Cat 7 100′ Ethernet Cable with an extension cord reel that allows me to setup the Starlink antenna anywhere within 100′ of the RV. If you’re wondering why I went with Cat 7, based on by research the Starlink Gen 2 can draw 200+ watts when the heating mode is enabled, I felt the Cat 7 would ensure that the cable would minimize loss over the length and different connections. Based on reading the Starlink cable itself is Cat 6 and is likely fine for this use as well.